Inkplate Dashboard with webtechnologies
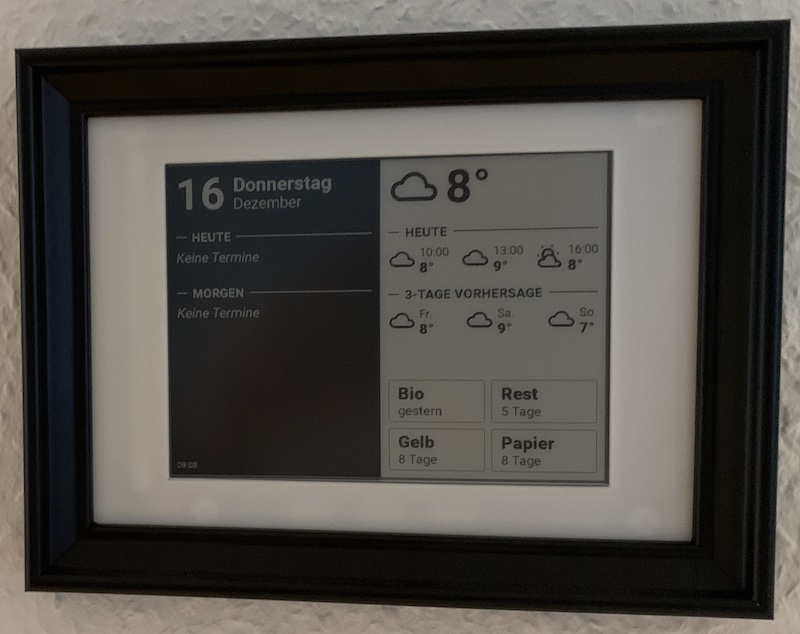
Some time ago I ordered an Inkplate 6 which basically is a recycled e-paper screen from an Amazon Kindle enriched with an ESP32 chip. So it has Wifi and is programmable using the Arduino IDE. The goal was to create a wireless dashboard for my living room to display upcoming events, weather etc. After tinkering around with the Arduino IDE and C++ I created a solution that pulls necessary data off a restful API that my Home Assistant provides and displays them on the screen.
But I was not really happy with the solution: It felt too complicated aligning texts and icons on the screen. I mean, everytime you change some positions you have to compile and upload the whole thing to the ESP32. This takes some time and is annoying. Also I was struggling with german umlauts which I was not able to display.
The idea
Wouldn’t it be nice if the changes made to the screen would immediately be visible to the developer? So I came up with the following idea: I want to develop my dashboard screen with web-technologies like HTML, CSS and Javascript and see any change in the web-browser. In production the Inkplate device just downloads a screenshot of this website and displays it - nothing more.
The solution
My solution consists of three components:
- A webapp that fetches data from a restful API and displays them.
- A minimal restful API that takes screenshots of that webapp and provides them for a download.
- The Inkplate client that calls the API, loads the screenshot and displays it.
Dashboard Webapp
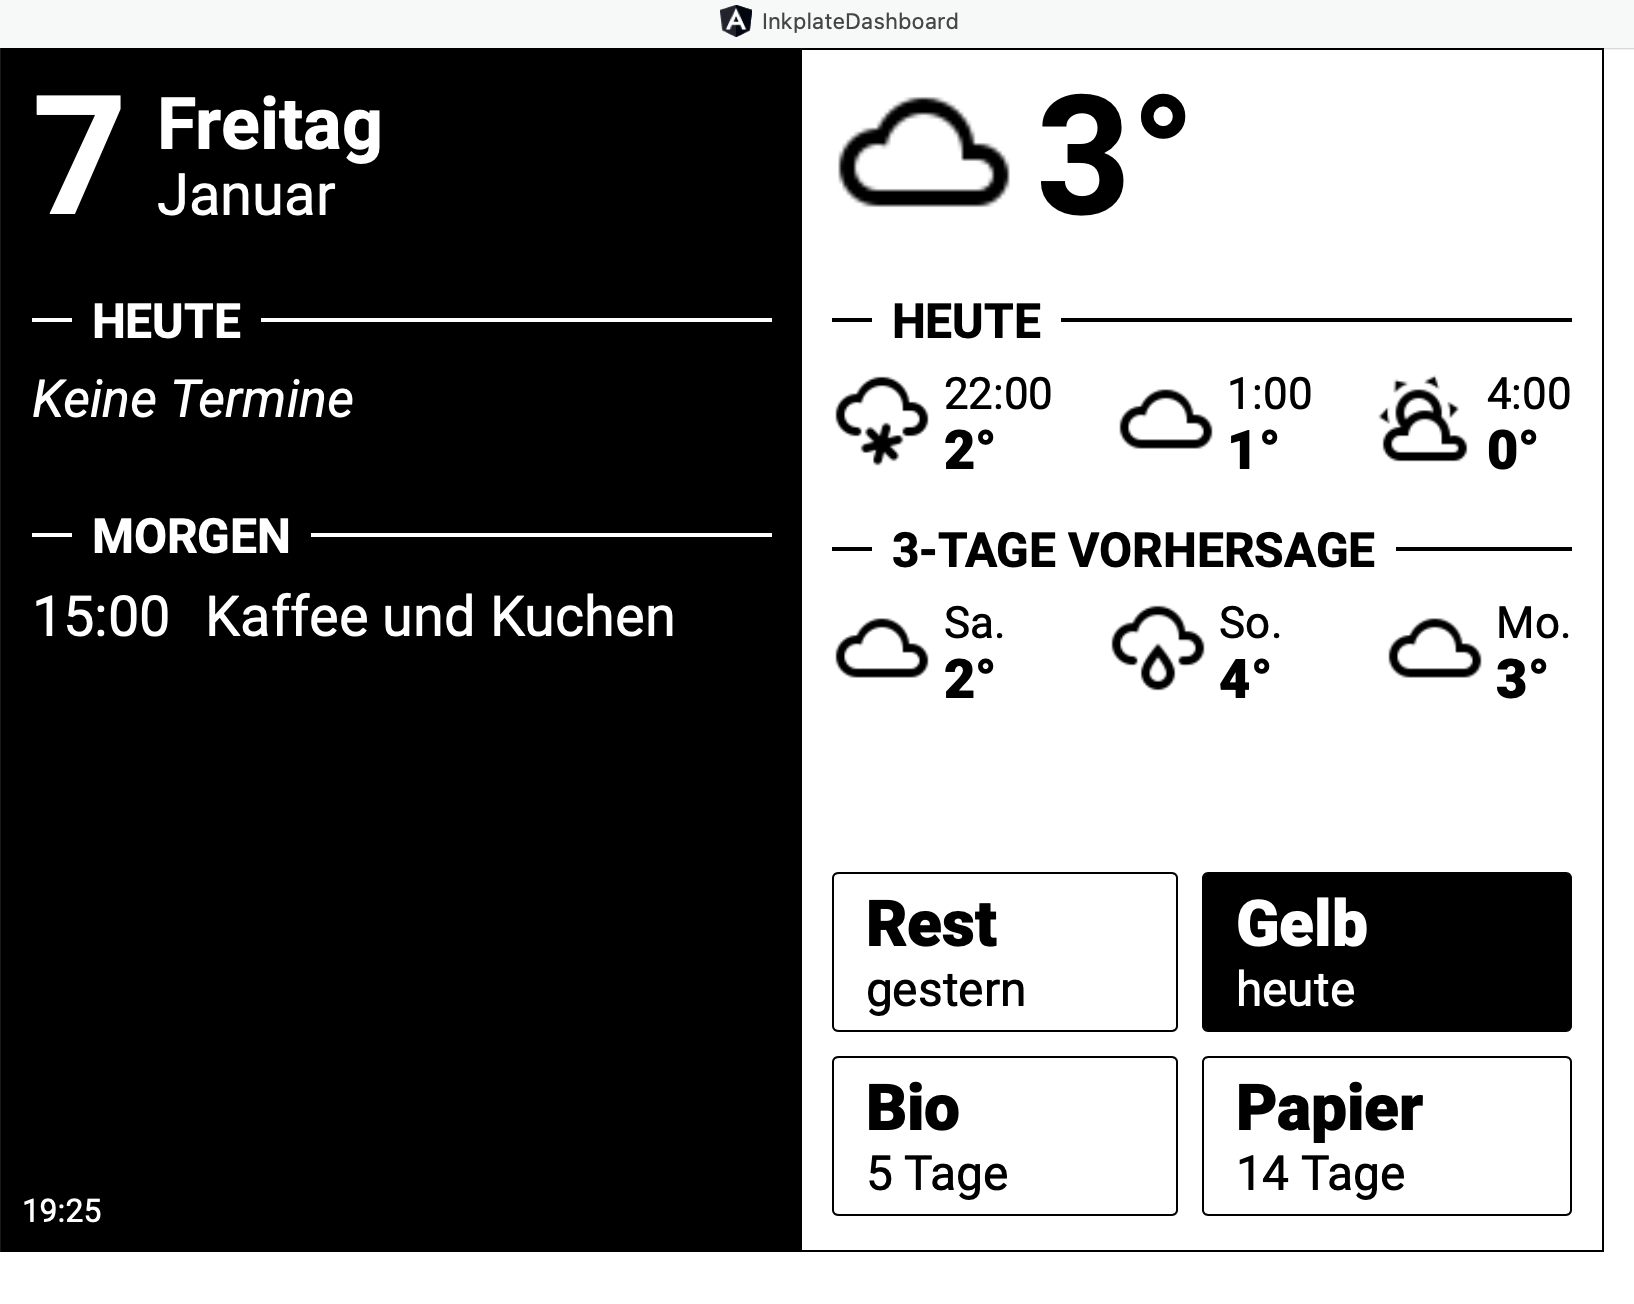
The dashboard is a simple Angular webapp that fetches the data from a custom API. The API provided data about upcoming events, weather and a garbage collection calendar. As the Inkplate is only capable to show monochrome colors, everything in the webapp is displayed in black & white colors.
Source: Github
Server for screenshots
The dashboard server provides an endpoint /dashboard/:id that will be called by the Inkplate client.
By using an :id parameter it is able to handle more than one dashboard - so maybe my living room dashboard will get
a sister sometime.
Different dashboards can be configured through the config.json. Each entry contains the dimensions of the dashboard
screen and a list of screens.
This means that a dashboard can handle different screens: Maybe you want to show a different page in the morning
than in the evening? Also a time-to-sleep can be configured using the sleep or sleepUntil property.
config.json
{
  "livingroom": {
    "width": 800,
    "height": 600,
    "screens": [
      {
        "url": "http://localhost:4200/dashboard",
        "from": "08:00",
        "sleep": 30
      }, {
        "url": "http://localhost:4200/dashboard-night",
        "from": "22:15",
        "sleepUntil": "08:00"
      }
    ]
  }
}
The configuration shown above will show the page http://localhost:4200/dashboard starting from 8:00am and the Inkplate
should sleep for 30 minutes afterwards.
When the sleep time has passed everything starts over until 22:15 (10:15pm): After this time the next screen
http://localhost:4200/dashboard-night will be called and the Inkplate should sleep until next morning 8:00am.
So, when the dashboard-endpoint is requested internally a Chrome session is started using puppeteer. It takes a screenshot of the given screen-url and stores it in an accessible folder. Also it keeps the previous screenshot - why? We come to that later.
Source: Github
Inkplate client
The code for the Inkplate is very simple and basically does the following
- Call the endpoint
/dashboard/livingroomof my backend. - Load the resulting screenshot and the screenshot taken before.
- Get the time-to-sleep from the backend.
- Draw the screenshot.
- Go to sleep.
The reason why we download always the current and the previous taken screenshot is, that the Inkplate will looses its memory when going to deep sleep. To perform a partial screen update without flickering the previous image is taken to make the Inkplate recall what is written to the e-ink display.
Source: Github
Sources